What better way to brighten up a rainy Monday than to spend the day creating something beautiful with coloured glass? This one-day workshop, one of several made possible by support from the Heritage Lottery Fund, was led by Gillian McGinley of Green Ginger Glass. Gill taught herself to work with stained glass twenty years ago and has forged a successful career making everything from windows for houses to gifts to sell through her own business, as well as leading workshops with children and adults.
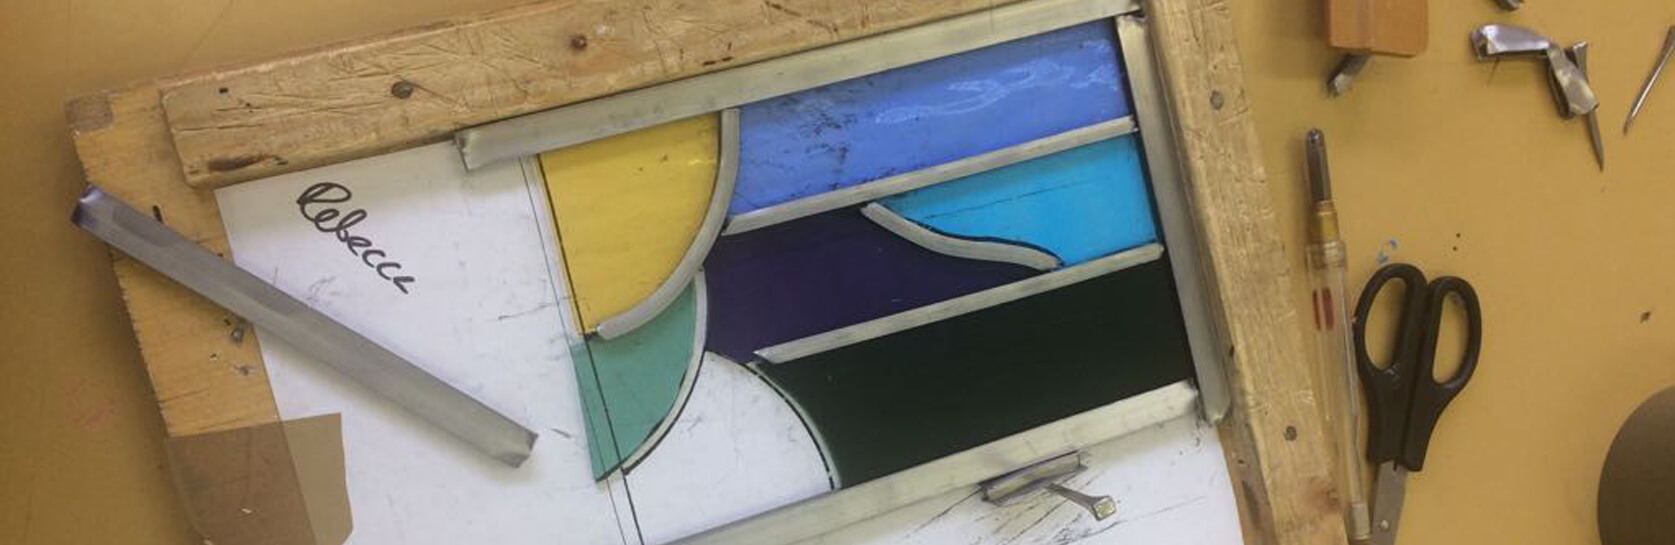
The technique of leaded glass has been used in Britain for hundreds of years and I doubt the process has changed much in that time. Gill had left a clutch of tools at each workstation: a set square, a sort of rotating, blunt blade, and what I can only describe as a blue plastic clamp. First, you choose your pattern. I blithely selected what I later learned was the more difficult of the pair. Then, you pick your glass from a selection of colours and textures: turquoise, scarlet, sea green, amber, deep purple… Gill explained that the paler the shade, the easier the glass is to cut, I suppose because the pigment reinforces the glass. I selected a soothing palette of blues, greens and yellows. The next step is to cut the glass. Straight lines are the easiest. Using the set square for accuracy, you lay the glass over the pattern like tracing paper and score a line from one end to the other, making sure to work on the smooth side if you’re using textured glass. It’s very important to draw the scoring tool from top to bottom (or side to side), otherwise the next stage will prove difficult.
Next, you clamp the blue plastic tool over the scored line, press firmly (but not too hard) and your desired shape separates cleanly from the sheet glass. It worked perfectly for me the first time (albeit Gill was standing beside me), and perhaps that gave my confidence a false boost, because after that, things began, quite literally, to fall apart.
After my triumph in cutting a turquoise rectangle, I moved on to a curved line. Here, you don’t have the set square to help you. You’ve got to work freehand, again tracing from the pattern beneath. The difficulty for me was applying the right amount of pressure so that the scoring tool didn’t slip. If at first, you don’t succeed, try, try, try again. And I did, until my smooth sheet of glass was covered in scratches. Eventually, I made a passable attempt at a semi-circle and could attempt to cut the glass. With rounded lines, the cutting technique is more variable. You can try pressing on the scored line with your clamp, but if that doesn’t work, you can tap the underside with the blunt end of your scoring tool and the excess glass should fall away to reveal your carefully-drawn shape.
And it works. Sort of. Only, the shape I was left with was less than perfect, displaying an uneven outline and jagged edges. Luckily, Gill was on hand to help me salvage it, expertly nibbling the edges with a pair of pliers until it looked just as I’d intended. I tried again. This time, my glass shattered and I was left with no shape at all.
As the morning wore on, I became surrounded by mounds of broken glass which I periodically – and sheepishly – swept into a container. Gradually, the selection of new glass on the table lessened until there was hardly any left at all – and I was nowhere near finished. My carefully-chosen colour palette was discarded as I scrabbled around for offcuts in any hue at all, as long as they were big enough for the task in hand. Cue Gill, who came to the rescue, once again helping me to fashion a jumble of also-rans into passable shapes. I gained a huge sense of satisfaction from arranging the glass in the correct pattern and surveying my (and Gill’s) handiwork.
But I couldn’t rest on my laurels for long. I was already lagging behind my fellow participants, who all seemed to have a knack with glass. So it was time to move straight on to the next stage: stretching the lead. This is done in pairs (although experts like Gill can do it alone) and involved pressing one end of a strip of lead firmly to the table while your partner pulls hard as if taking part in a tug-of-war. You then cut to size by moving a sharp tool in a see-saw action.
After that, Gill demonstrated how I should arrange thicker lead to frame the pattern and shape the more slender strips around each segment of glass, cutting them slightly short and at an angle so they all (in theory) fit snugly together. Leaded glass, I realised, is akin to a complicated jigsaw puzzle, and it’s at this stage that the flaws in your glass-cutting are exposed. Mine required a few tweaks from the tutor to erase gaps and shoehorn in pieces that were too large.
Then, after I’d rubbed the joins with wire wool and tallow, my lead was ready to be soldered. The process being irreversible, I was a little nervous, so watched a fellow participant at work. Alan, I’d discovered, had a lot of experience in DIY, and was a dab hand with the soldering iron. For those of you – like me - who’re not, the idea is to hold the iron like a pen and melt a thin silver stick onto the joins of your lead to stick them together. I thought the solder would remain hot, but in fact it cools in seconds, so I was soon ready to do the other side. All that was left to do was admire the finished product – flaws and all – and bask in the satisfaction of having made something with my hands.
Am I a budding glass artist? I doubt it. Will I be giving up the day job to sell my work? Most certainly not. Would I do another workshop like this? Absolutely. It was utterly absorbing, I learnt a plethora of new skills, and I came away with a newfound admiration for glaziers and glass artists which means that church windows will never look the same again.
Art of glass
Tuesday September 26, 2017